Wi-Fi hotspot allows other devices to connect to your macbook for sake of internet or file sharing. You can turn your macbook into a router by turning on Wi-Fi hotspot, other devices or laptops can them connect to the same hotspot. The hotspot works similar to a Linux, or Windows 10 Wi-Fi Hotspot.
Use macbook as Wi-Fi hotspot
You can share your macbook’s internet with other devices using hotspot. The procedure is simple:
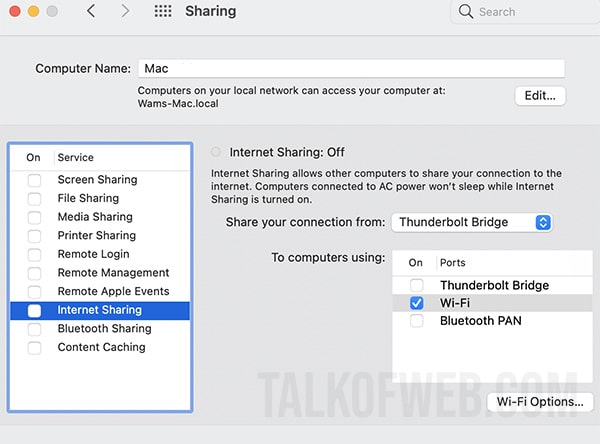
- Open System Preferences > Sharing.
- Select Internet Sharing and choose Share your connection from based on the situation. For Ethernet, select Thunderbolt Bridge and then click on Wi-Fi. Similarly, if the internet is working using Bluetooth, then select Bluetooth and select W-Fi (i-e Other devices will connect using Wi-Fi, whereas internet source on macbook is Bluetooth).
- Tick Internet Sharing, a popup will appear asking you to name your Wi-Fi hotspot along with the password. Give name and password of your choice.
- Open the target device,, which you want to connect, and search for the Wi-Fi hotspot which you just created on your macbook.
Additionally, if you’ve a USB Internet adapter provided by an internet company. Simply, select that same adapter at Share your connection from, then select W-Fi.
In a similar fashion, you can share your macbook’s internet to the iPhone connected with USB. The option of iPhone USB will appear in the To Computers Using > iPhone USB.
Conclusion
MacOS comes with many options to share your internet connection from macbook to an external device like a laptop or smartphone. This can allow you to share files using Wi-Fi utilities, or share the internet connection with other devices. The internet sharing process works with bluetooth, W-Fi or even ethernet cable. This is a good portability decision which helps you save precious internet data by using only one internet connection.