Often it becomes necessary to add another post type to the wordpress despite having the main posts section under dashboard. This another post type for categorizing our new kind of posts is known as custom post type for wordpress. This can be for anything like suppose we want to register a custom post type in our wordpress for tutorials. We need this tutorials custom post type because we want our tutorials in a separate posts section which must be apart from the regular posts. After reading this article you will be familiar with custom post type and you will come to know that how can you register wordpress custom post type.
Registering – Adding WordPress custom post type:
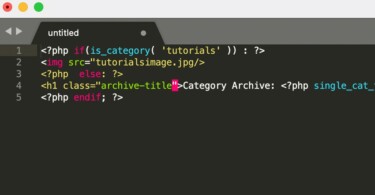
I am going to register a sample custom post type in my wordpress installation. The name of this post type is going to be tutorials. Let’s register this custom post type. We shall need to edit our wordpress theme for this purpose. Go on and edit “functions.php” to register custom post type. Add the below code into it:
add_action( 'init', 'create_post_type' );
function create_post_type() {
	register_post_type( 'tech_tuts',
		array(
			'labels' => array(
				'name' => __( 'Tutorials' ),
				'singular_name' => __( 'Tutorial' )
			),
		'public' => true,
		'has_archive' => true,
		)
	);
}
The above code once added to the functions.php of the wordpress theme will register a custom post type “Tutorials” in your wordpress dashboard. The unique identity given to this custom post type is “tech_tuts” this unique identity will be used to call the posts from this custom post. Also this unique identity will be present in the url of the posts, posted under his custom post type.
The labels in the above code determine the label shown in the dashboard for this tech_tuts custom post type. I have chosen the plural name to be tutorials and singular one to be tutorial.

You can see in the above screenshot that how a custom post type has been registered in the wordpress. In the registering code placed in functions.php the public => true value shows that the posts in this custom post type can be shown publicly.
Controlling Labels of Custom Post type:
The above was just a basic example of creating a custom post type in the wordpress. You can typically control every label of custom post type shown in the dashboard with the help of the above code. You just need to add labels to the label section of the above code. You can define following labels through the following code for the wordpress custom post type:
'labels' => array(
	'name' => __( 'Tutorials' ),
	'singular_name' => __( 'Tutorial' ),
	'add_new' => __( 'Add New' ),
	'add_new_item' => __( 'Add New Tutorial' ),
	'edit' => __( 'Edit' ),
	'edit_item' => __( 'Edit Tutorial' ),
	'new_item' => __( 'New Tutorial' ),
	'view' => __( 'View Tutorial' ),
	'view_item' => __( 'View Tutorial' ),
	'search_items' => __( 'Search Tutorials' ),
	'not_found' => __( 'No Tutorial found' ),
	'not_found_in_trash' => __( 'No Tutorials found in Trash' ),
	'parent' => __( 'Parent Tutorial' ),
),
The above code added to the functions.php registering custom post type code will control the text shown for different labels in the dashboard. The things are self defining but still I can explain all the labels:
- Name – Shows the name for the custom post type to be shown in the side bar of wordpress dashboard.
- singular_name – Shows the label for single Tutorial or you can say post under tutorials.
- add_new – Shows the label of adding new post to tutorials.
- add_new_item – The header shown while adding a new post to the tutorials.
- edit_item – The header shown while editing a post in tutorials.
- not_found – When no post is added to custom post type section this message is displayed.
Thus, all the things are self explaining and you can easily control every label to be different from the other one or the regular posts in wordpress.
 Thus, above you can see that how the labels are working. In the add new header I have got “Add new tutorial“, Here the labels come into play.
Making custom post type behave like Pages:
Pages don’t have a category and they are away from the timeline structure. Posts are in a timeline structure but the pages are just independent. By default the custom post type behave like posts but you can also make them like pages with the following configuration code:
'hierarchical' => true,
By setting up hierarchical to be true, the custom post type will behave like a page then.
Adding thumbnail, Custom Fields, Editor and Excerpt support to custom post type:
Custom post types are just a new born posts with different parent category of your choice. These custom post types are out of the main posts grid and thus giving you very best options to organize your blog or site using the wordpress. You can easily add support for featured image, editor and other things for a custom post type with the help of following code added to “functions.php” custom post type registering code shown in the first step.
'supports' => array( 'title', 'editor', 'excerpt', 'custom-fields', 'thumbnail' ),
Thus, the above code is going to add support for certain functions for custom post type.
- Excerpt – Shows a text area for adding a custom excerpt.
- Thumbnail – Adds the featured image support for the custom post type.
- Custom-Fields– Adds the custom fields input area for the custom post type.
Thus, you can add or remove support for certain things in custom post type.
Taxonomies or Categories in Custom Post type:
You can also add the taxonomy support for the wordpress custom post type. The following code must be added to the registering function of the custom post type in the functions.php of your wordpress active theme.
'taxonomies' => array( 'post_tag', 'category '),
Querying / Showing Posts From Custom Post type in your wordpress blog:
It is much easy to show posts from a custom post type in the wordpress. You can show posts from a custom post type anywhere in your theme. It can be the index page or else it can be any page where you need to call posts from the custom post type. You will just need to change the regular loop code and will need to include the custom post type name. If you don’t know about the wordpress post loop then you should read this article in detail:
Learn about wordpress posts loop – Every thing which you will need to call posts in wordpress
After you know about the regular post loop used to query posts from the sql database. You can go forward to look this below loop for calling posts from the custom post type:
<?php
		$loop = new WP_Query( array( 'post_type' => 'tech_tuts', 'posts_per_page' => 10 ) );
		while ( $loop->have_posts() ) : $loop->the_post(); ?>
		<?php the_title(); ?>
		<div class="entry-content">
			<?php the_content(); ?>
		</div>
	<?php endwhile; wp_reset_query(); ?>
The above code is used to call the posts from the custom post type. You can see that I have added an attribute post_type => tech_tuts and that is the unique id of the custom post type which I have used while registering the custom post type. The next thing is number of posts to be called and which is set to be 10. If you have read the article about post loop you can get other things.
Important note if custom post type is not working or Single of Custom Post type is not working:
Sometimes the custom post type doesn’t work, you are able to post content in the custom post type but when you open the posted article in custom post type it says that 404 not found. This is because of the permalink issue of the wordpress. To solve this, you need to go to dashboard of the wordpress blog.
Go to “Settings>Permalinks” and then update your present permalink structure by just clicking on the “Save Changes“.
Now view the post in custom post type and it is going to show you the content. Rest I will cover custom post type template and taxonomies in the next tutorial. Don’t forget to subscribe to the talkofweb.
[…] Adding WordPress Custom Post Types for Different category of Articles and Posts […]