Windows live writer is a good blogging tool which can be used to write posts and publish them easily at your desired blog. It might seem of no use to wordpress users but for blogger it really worth’s a lot since many users don’t want to use the div layout for publishing the posts and a font-size inline parameter instead of using h1, h2 or h3 for the headings and <p></p> for the paragraphs to make better blogging posts format. Also often you are not able to save your post in the draft or fail to publish just because of some foolish internet connection error, thus you can save an offline copy easily using the Windows live writer and can publish is some later time in case of any emergency situations. Emergency situations like the time when you started to write post you had internet connectivity but when you just finished, the machine went off or internet got disconnected and all that written hardwork became a part of past. Thus, to avoid such errors you need this tool immediately which will help you in this way:
How Windows Live Writer is going to help you for Saving Offline Posts and for A better Blogger posts format:
When you are writing something you can easily save that to your computer by pressing ctrl+s after regular intervals.
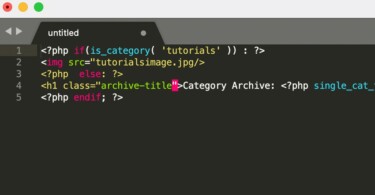
- You can easily use heading tags and paragraph tags to strengthen the html layout of your posts while blogger uses inline styling to make your fonts larger to suit heading and uses divs instead of paragraph tags.
- You can easily add images to your posts and can add tags and effects to those images also using the windows live writer.
- Obviously if you liked it then you are able to use all the blogs in the same software at the same time.
- You can get a previously posted post at the same machine. (important: windows live writer saves the offline copy to the machine so don’t be foolish enough to remove the software and assume that it must have kept the offline copy of posted content or transferring the software to other computer will also not bring your posts, you can just try this software to avoid any hassle situation like described above. )
- Windows live writer even shows an online preview of your post using the installed theme on your blog without any internet connection but for publishing your surely need an internet connection.
Installing Windows Live Writer to your machine:
Download the setup from here(official windows live writer download link). Install the Window live writer using this online setup as guided below.
 2- Your setup should start and you should get the screen like this shown above after that you will get a choice of the windows live tools to be installed on the machine. Just click windows live writer if you just need the software described in this post other wise you can install other too but it will take just disk space if you are not going to use them all.
 3- After clicking install Windows live writer will be installed. Fireup the installed software and now you need to accept the agreement. Click Accept and after that you will need to add your blogger account on which your specific blog is hosted. Write down the username (which is your blogger login email id) and write down the password (which is your login password for that blogger account). (important: tick remember my password if you don’t want to put your password always while drafting or publishing your posts.)
4- Allow windows live writer to grab the theme files of your blog by publishing a temporary post and don’t forget to remove that temporary post if you auto sync your blog posts to various social networks. That post will be automatically deleted from your blogger account once theme is detected for live preview. You will get your post compilation dashboard.
5- You will notice that you post input area just looks like the theme which you have installed, the fonts colors and heading styles are same, yes this is the power of windows live writer you can easily judge that how you post will look like once it goes online.
Tips to use Windows live Writer to it’s best for blogger or other services like WordPress:
- Don’t publish your posts immediately after you have written them instead draft them to your blog and then go to browser and login to your blogger account. After that you must edit your meta description and other fields which are not available in windows live writer.
- Press ctrl+s after regular intervals so that your written work may not be destroyed in case of any power failure here in windows live writer internet is concerned with just publishing and drafting.
- You should just h1, h2 and h3 in your posts and should use the paragraph tags of html for a better SEO fortunately windows live writer will do it for you without any effort of editing the source code as in blogger dashboard.