Google analytics is surely a powerful tool to keep a track of your website/blog visitors. A lot of new comers in the blogging world are not aware of this great toole available free from the google inc. You can actually measure the number of daily hits and a deep detail about them to your website using the google analytics. You just need to incorporate a javascript into your website/blog to track the visitors and as a result google analytics provide you a dashboard to learn about detailed traffic. This article will teach you some details about how to use the google analytics.
Learn How to use Google Analytics with your Website/Blog:
I am supposing here that you haven’t yet installed google analytics to your website, also you don’t own a google analytics account at present. Thus, I am going to start from the very basics. Creating your account and installing the javascript. And then later how to use google analytics dashboard to keep track of the visitors and search queries to your precious website/blog.
1- Creating an account at Google analytics and Getting the tracking code:
You need a gmail or say google account for this whole process. If you don’t have a google account then signup here. Now you need to login, so just login to your newly created google analytics account – Login to Google Analytics.
Once you are into your account, you just need to add your website or blog. The steps for adding your blog to the google analytics are listed below:
1- Go to the Admin (That icon at the top navigation bar), There you need to create an account for your property to be listed in, the property in this case is your website.

2- You need to create an account in the admin settings of google analytics. You can find create an account in the drop down section as shown in the screen shot below.

3- You’ll need to provide the information of your new account, like account name which you want to keep and the website url which you want to track for the incoming visitors. I don’t need to explain such things, you can fill in this yourself with quite an ease. At the end of this information input fields , click on the “Get Tracking ID“.

4- The “Get Tracking ID” button on clicking will submit your website to the google analytics. It will add your website as your property in the account section. Now, you’ll be taken to the tracking code. The tracking code will be like the one shown in the screenshot, just copy the code which you get. This code is the most important thing which will help you to track incoming visitors and searches to your submitted website. Write this code into a safe text file as later you need to add this code to the head section of your website.
![]()
You have now the tracking code, let’s put this tracking code into your website.
2- Adding/installing the tracking code of Google analytics to your Website/Blog:
You actually need to put that copied code in the last step into the <head> section of your website such that, the code is loaded everywhere the website is rendered to the visitor. Don’t put the code to some specific pages only, instead put the code to every page where you need to track the visitors. That’s why I said to put in the <head> section of your website.
If your website is hosted using WordPress then using google analytics is quite easy. Just login to your WordPress website and paste the copied code into the header.php just above the wp_head(); but keep in mind this is the javascript so don’t keep it inside the php tags. Just go to Dashboard >> Appearance >> Editor >> header.php and there put the code inside the <head></head> tags.
That’s it you are ready to see live traffic landing onto your blog using the google analytics dashboard.
3- Tracking/ Viewing realtime visitors and visits history on your website/blog using the Google Analytics dashboard:
It’s time to show you some important functionality of the google analytics dashboard. Like keeping a watch on the realtime visitors, tracking the searches and also having a look at the visitors history to your blog.
1- Tracking realtime/online visitors on your website:
Just head to google analytics. Open “Access Google Analytics” (at the top right corner of the screen) after that just click on the account and then click on property inside that account. You’ll be taken to a screen like this:
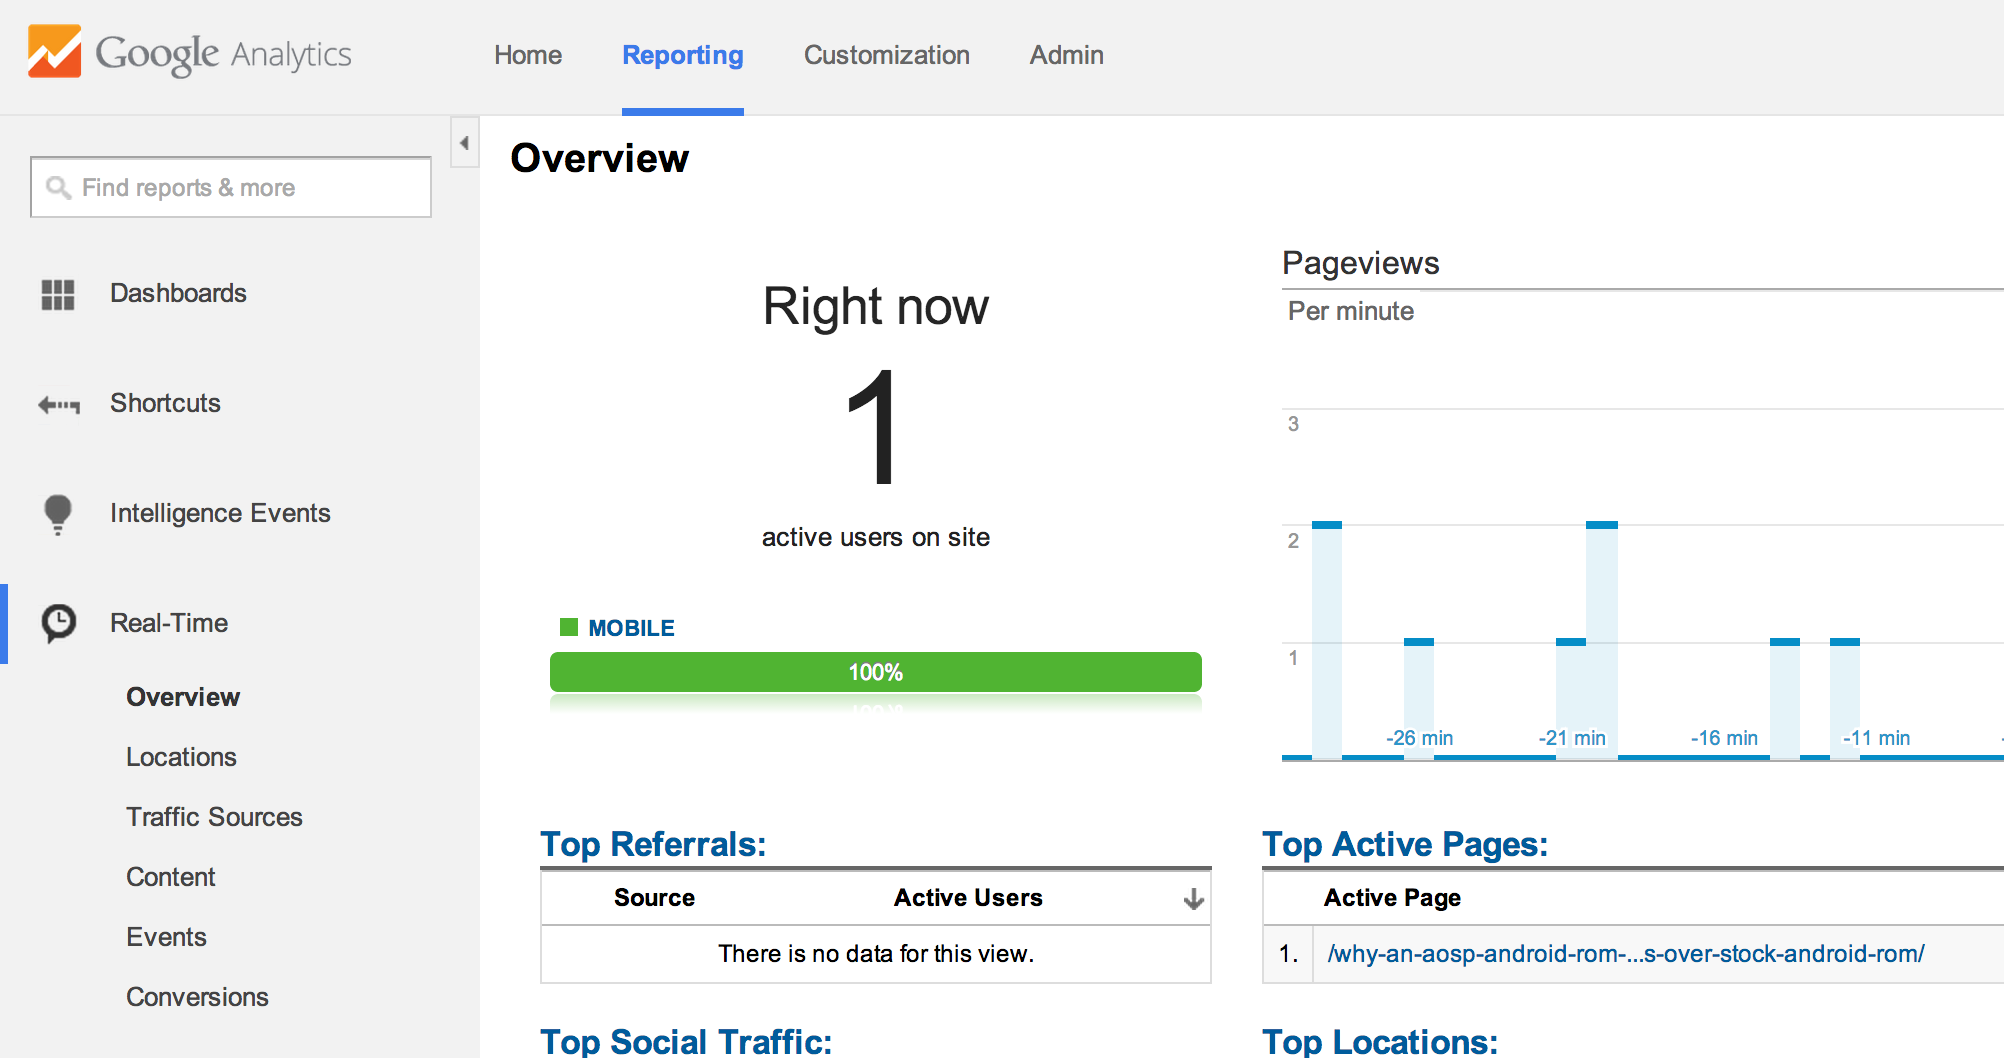
Here you actually keep a track of the online visitors on your website. You can see that at the left column you can also sort visitors depending upon their locations. You can also have a look at the content being visited. So, inshort you can gather a lot of information about the online visitors present on your website. That code which you have added is actually responsible for tracking visitors in such a detail.
2- Checking out the Traffic History of your website using Google Analytics:
You can also have a look at the traffic history of your website using the google analytics. Using that you can setup secondary dimensions like the type of device your users were using, the country form which they belong and stuff like that which will help you in understanding your audience. Have a look at the screen shot below:
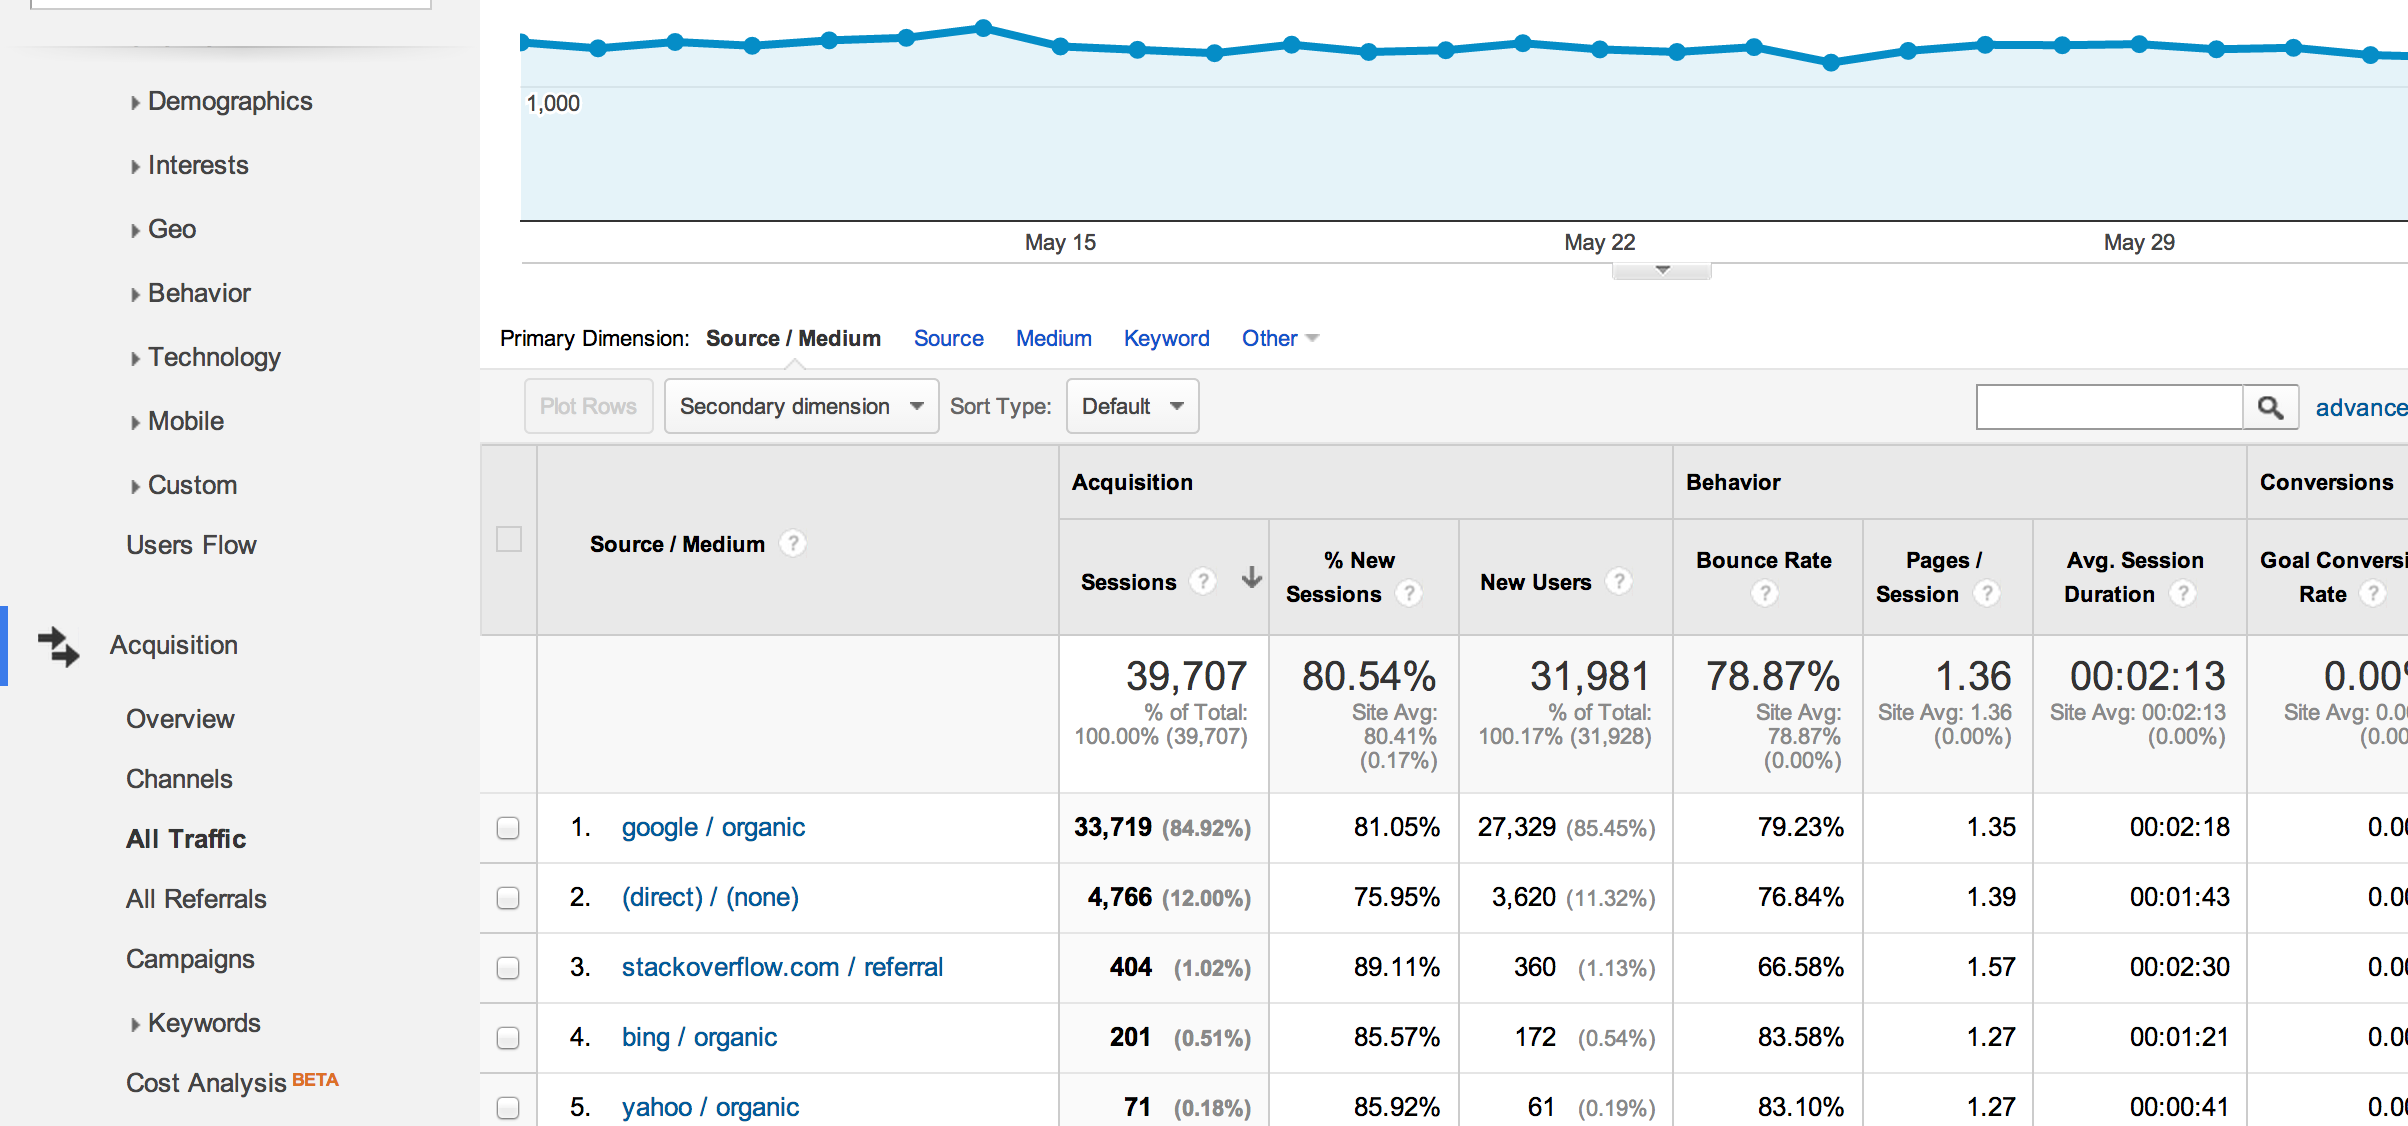
You can see that which type of traffic actually landed to your website and all this is possible only because of the “Acquisition” tab of the google analytics. You can also setup secondary dimensions for sake of keeping a check at country, device and operating system of the visitors.
3- Checking out the search keywords using Google Analytics:
You can also keep a check at the incoming searches which perform well for you in getting your traffic to the website. Inorder to check the searches you need to again go to the google analytics dashboard. From there you need to navigate to Acquisition >> Search Engine Optimization >> Queries , and hence here you can see the traffic which comes to your website due to the search engine queries. You can add more queries to your website through content of the same type of searches which bring you the most of the traffic.