Feedburner is around us from a very long time and is serving well to those who want a free solution for the email subscription service of their blogs. Email subscription is much important in a sense if you really value about your content and readers, it basically gives you readers an opportunity to get your recent posts directly in their inbox. In turn it is also important for the owner of the site or blog in a sense that due to this service he generates a good list of active emails, which once become massive can be used for these two purposes:
- Driving massive traffic through the list to your website
- Using the list for the blog related promotional purposes
Thus, if any blogger is generating a quality content then it is necessary for him to give his readers an option to subscribe to the posts with the help of an email. After reading this article you will be able to create your own subscription service to allow users get your posts directly in their inbox. I will use a free email subscription provider the feedburner here!
If you are a noob blogger then it will be worthy to read this post: How to start a blog! things which matter a lot
Benefits of using Feedburner:
- Following are some of the core benefits which you can get if you use feedburner for your blog! Whether that is a wordpress blog or else a blogger blog.
- You can easily get a count of your subscribers and can show off at your blog!
- You can export a list of subscribers in a excel sheet.
- You can customize the way your feed looks.
- You can easily add google adsense to your feeds if you got an adsense account.
- Can manage all the things from on feedburner dashboard.
Setup feedburner for your own blog – wordpress or blogger:
1- You need to have a blog and a google account to use feedburner. Visit Feedburner Home page and login to it through your google account. You will be taken to this page once your login.
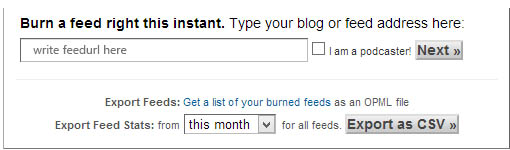
2- Put your feed address of the blog in the above field. In case of blogger it will be : http://www.yourblog.blogspot.com/feeds/posts/default?alt=rss and in case of wordpress it will be like: http://www.yoursite.com/feed so what so ever platform you are using just construct your respective feed url. After you have made your feed url just put in the above field as shown in the screenshot.
3- In this case I am using the feed url: http://talkofweb.blogspot.com/feeds/posts/default?alt=rss thus, I have put the url in the field and pressed Next. You will be taken to a window where you can setup your new feed url plus the name of the feed.
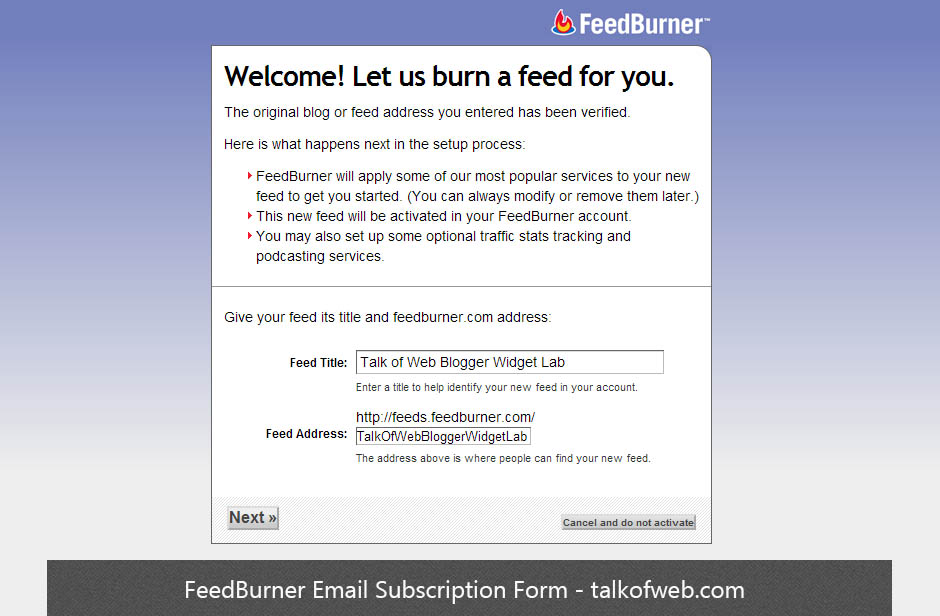
4- At pressing next it will give you the new feed url, now anywhere you can use this new rss feed url provided to you by the feedburner since it fetches your posts feed from the main feed of your blog i-e the one described in the first step.
5- Press next and in the third window you will have the options for your feed’s stats like below:
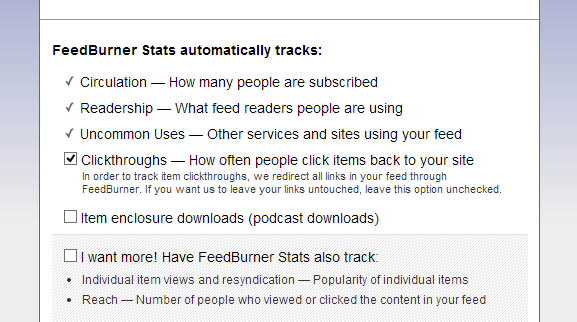
Select any options which you want to trace, or else let it go as I did in the screenshot. Just press next as you did previously. On the next page you will be taken to the common things which you can do with the feedburner, either go that way or else follow this tutorials to show the email subscription form on your blog using the feedburner. Till now we have setup the rss service with feedburner for our blog but now we also need to generate an email subscription form.
6- In your feedburner account, just navigate to “Publicize” and then click on the “Email Subscription” in the left pane. Then you need to click activate, in order to turn on email subscription.

7- After you have activated the email subscription, now you need to take the code for the email subscription form which you can put in a widget at your blog. The code will basically embed the feedburner form in your blog. Take the embed code from the first block in the email subscription and copy it.
8- In case of wordpress just paste the code in a new text widget and at the front end of your blog, a subscription form will be there. In the case of the blogger you again need to add a new gadget in the layout section which must be html/javascript widget, and then save the gadget to show up the subscription form at your blogger blog’s front end. The feedburner’s subscription form will be like this:

So that is it, now the visitors can put their email address in this form and can easily subscribe to your precious content. Any email added to this form will be added to the subscriber’s list. The users will need to confirm the subscription so don’t forget to add a note below the subscription form that the confirmation of the email is mandatory. I’ll be posting another tutorial on how can you edit this form to make it more eye catchy with css and html. So don’t forget to subscribe with email.
How to add feed count:
The feed count is also a sort of code from the feedburner dashboard which can be taken from publicize >> feed count and can be added to a new gadget or into the template of your blog just as we did in the above email subscription form, to show off the number of subscribers in your specific list of feedburner account. Thus, this ads the marketing part.