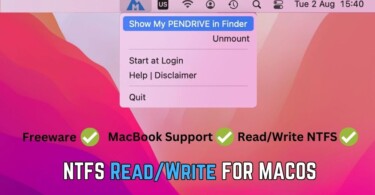
Your Mac by default doesn’t allow you to save data on an NTFS partition. The macOS disables it by default due to security reasons. Therefore, you need to make some changes which will allow you to manually mount your NTFS USB or External hard disk in a read-write mode. There is some paid software which allows you to mount an NTFS partition in write mode, however, we shall be discussing a free and open-source utility.
Mount NTFS in Read-Write mode using NTFS 3G:
If you want to store something on your NTFS formatted drive, then you need to install this excellent command-line tool on your Mac. It allows a mac user to mount his Microsoft windows NTFS system USB in read-write mode. Install NTFS 3G using brew package manager on Mac.
brew install ntfs-3gHandling Error: You need to install osxFuse:
In case, during the installation you encounter an error that your system should have osxFuse, then install it using the following command:
brew install --cask osxfuseIt’s NTFS driver on macOS which works behind the ntfs-3g. Fuse implements a way using which a filesystem can run inside a user-based program. Therefore, it doesn’t present a security risk, unless the user doesn’t know what he’s doing.
Terminal commands to mount NTFS in read-write mode:
After the installation, you need to check the device name of your external NTFS drive in your system. In order to do that, you need to use diskutility CLI tools, which are built-in tools. Run the following command:
diskutil listThis will list all the physical and external hard drives connected to your laptop.

The image above shows the external USB drive. I will like to mound disk2s1 as a writeable NTFS volume on macOS. Run the following commands to do that:
sudo diskutil unmount /dev/disk1s1
sudo mkdir /Volumes/NTFS
sudo /usr/local/bin/ntfs-3g /dev/disk2s1 /Volumes/NTFS -o local -o allow_other -o auto_xattr -o auto_cache
The first command will unmount your already mounted drive. Since macOS mounts everything automatically connected to the lightening or USB-C port. The next command creates a folder inside Volumes where you’ll be able to mount your NTFS drive. The third and last command does the magic as it allows you to create a volume and mount it with read-write support.
The mounted drive will appear on your desktop as well as in the sidebar of the Finder windows.
Handling Error: Allow osxFuse in Security and Privacy under System Preferences:
Despite the above process, you might come across an error asking you to allow Fuse developer inside your Security and Privacy. This is a macOS security feature which only allows developers identified within the system of App Store. As a result, you need to add an exception.
- Go to System Preferences.
- Open Security and Privacy.
- Click on unlock icon shown in the bottom-left and enter your system password as asked.
- Press Allow button and make sure that the App Store and identified developers are allowed.
Restart your system and you are good to go.
Conclusion:
Mounting an NTFS drive with read-write support on a mac is an easy task. You need three things to accomplish the desired task, brew package manager, Fuse for OSX and finally NTSFS-3G. All of these packages are free and open source. Alternatively, you can always run windows virtually inside a mac system.


